

I wrote this tut with PSPX2 and Animation Shop 3.
This tut is written for those with a working knowledge of PSP and AS3.
Although I usually try to write my tuts so that they can be understood by newbies (being a newbie, myself;), this one will require a working knowledge of PSP and the plugins, as I intend to make this as short as possible. If you follow this tut, as I have made the tag, you will end up with a total of 30 layers, for your finished image. If you’re brave enough to take this one on, start a pot of coffee and let’s get to it;)
**c&p=Copy and Paste As New Layer
**When working with duplicate layers, I always refer to them as 1st, 2nd, 3rd…and so on, from the bottom up.
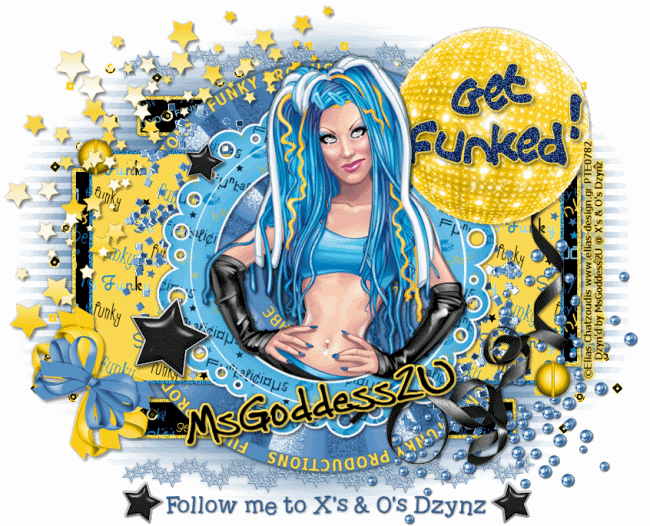
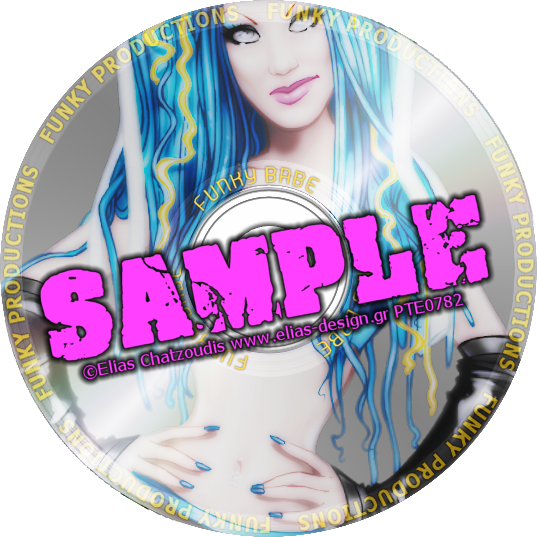
I am using the awesome artwork of Elias Chatzoudis. You must have a license to use his work and you can purchase his work and get your license at PTE
I am using another kick ass kit by Tamie called Blue Funk and you can you can purchase it at Dreams-N-Digital
The Template I am using is one that I made for this design and it is called Get Funked! and you can get it here .psd .psp
(the .psp template has the vectors, if you want to change the wording for the CD)
I have added an addendum to this tut, for those of you who cannot afford to get this kit
This is my first attempt at making a CD but it didn't turn out too bad:) you can get it here
For those of you who are using this CD and a different kit, you will find the addendum at the bottom of this tut
Plug-ins Used:
dsb flux / Bright Noise
Eye Candy 4000 / Gradient Glow
Xenofex 2 / Constellation
Fonts Used:
Angryblue Controlled
2 Peas Typo
Remember to save often!!
Open the Template, duplicate (Shift+D), close the original and delete the credits and the small circle frame; keep the small circle but hide it. We are going to use this small circle later to cut out everything that is covering the center of the CD within the frame
From Tamie’s Kick Ass Kit
There are a lot of great papers to choose from in Tamie’s Blue Funk Kit; use the papers of your choice, for the 3 layers with rectangle shapes. Activate your chosen layer, click on the transparent part with your magic wand, c&p the paper of your choice, hit delete and select none.
Frame colors can be changed with your Manual Color Correction Tool
Activate the Funky Productions layer and apply a Drop Shadow, with these settings

Now, resize your Funky Productions layer one pixel smaller (making sure that your pixel dimensions are locked; so you will only have to change the value in one box, not both)
Now grab your pick tool, Mode: Scale and change the value for Position X: from 137 to 138, merge down onto the CD
Activate the funky babe layer and apply a drop shadow with these settings

Merge Down on to the CD.
I think that we all know that if you continue to use the same image and just duplicate it and rotate it more each time, it loses its quality and it’s all blurry and hideous when all is said and done, right? Soooo…..
Duplicate the CD 9X (giving you 10 layers). I usually start working from the bottom of each group and refer to the layers as 1st, 2nd, 3rd and so on, we are starting at the top of the group, this time, activate your 9th copy of the CD layer, change the layer name to “0”, I named each layer with the rotation value. Copy 8 was named 36, Copy 7: 72, Copy 6: 108…you get the idea; 144, 180, 216, 252, 288, 324
CD Rotation: Free Rotate (Ctrl+R), to the Right, (If you named your layers by their rotation values, as I did, you won’t need to refer back to this tut for the rotation values) 8th copy:36o, 7th copy:72o, 6th copy:108o,
5th copy:144o, 4th copy:180o, 3rd copy:216o, 2nd copy:252o, copy:288o, original layer:324o
5th copy:144o, 4th copy:180o, 3rd copy:216o, 2nd copy:252o, copy:288o, original layer:324o
Add a Drop Shadow to each of the CD’s with these settings

Go down the line and duplicate and arrange each layer in the correct order 2X so your group of CD’s looks like this (a total of 30)

I swear, I tried this different ways, so that there would be less layers, but it just didn’t look right.
Resize your canvas now to 850 X 690…I like a little bit of working room but this is what my finished and cropped image size is (actually it is 846X685 before resizing)
Activate your mask layer (if your want a different color, feel free to change the color of any of my layers or arrange them differently, I’m not picky)
More From Tamie’s Kick Ass Kit
(when working with elements, I usually c&p as the top layer so that I can see exactly what I am working with and, once I have what I want, I arrange the layer/s where I want)
Sequins: c&p, arrange to one side of the image, to your liking, Duplicate, Mirror, and arrange both layers just above your mask layer, if you are happy with their positions, Merge Down both onto your mask layer.
Stars2: c&p, resize 60%, position to your liking at the top, duplicate, flip, mirror, if they are positioned to your liking, merge together, arrange to just above your mask layer, I added a light drop shadow (something like 0, 0, 20, 5) before merging down onto the mask layer.
Glitter: c&p above the rectangle2 frame layer
Beads: c&p, flip, mirror and position at bottom right, arrange layer just above glitter layer
Screw: c&p, resize 30%, duplicate and place at corner of rectangle2 frame, merge these 2 layers together, arrange above the beads layer
Bow3: c&p, resize by 60%, rotate 45o right, position at bottom left corner and arrange down to just above the glitter layer
Activate your small circle layer
Frame: c&p, resize 80%, apply Gradient Glow; choosing Fat under the Color tab and these settings under the Basic Tab

If you add a Drop Shadow to the frame, make sure that you do it on a separate layer (I do this to give her more of a 3D effect in the frame, I add one in each direction: Vertical:-1, Horizontal:-1, Opacity:50, Blur:3 & V:2, H:2, O:60, B:5 and merge them into one layer).
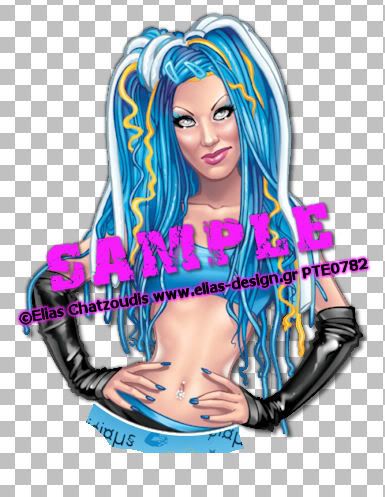
Tube: c&p the CU, resize 80%, and position to your liking.
Duplicate the frame and arrange above the CU
Activate the CU, Select>All, Select>Float, Select>Defloat,
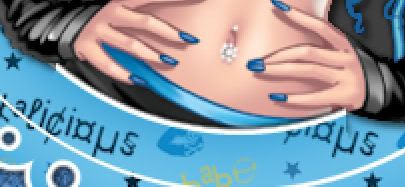
Erase as much of the bottom part of the CU as you can, that is within the frame area
Activate your 2nd frame layer and erase all of the parts of the frame that cover your CU’s head and arms
Select>None and erase the remainder of the 2nd frame, leaving only enough to cover to lower part of the CU at the bottom of the frame (it is very important that you do not leave any other portion of the frame).
If you added Drop Shadows to the frame, activate the Drop Shadow layer, grab your Lasso with the settings Selection Type: Point to Point; Mode: Add, Feather: 0, Smoothing: 0, and select only this portion of your image

Edit>Copy.
Activate your CU, open New Raster Layer, Edit>Paste Into Selection, Select>None (I duplicated my shadow copy and merged together)
Add your drop shadows to your CU. If you added shadows both directions, merge them together, grab your eraser set to these settings\

And clean up any edges and frame copy and shadows. I had this to begin with

and ended up with this

Once you are satisfied with what you have, merge the frame copy, shadow copy, CU tube and CU shadow together and arrange at the top.
It should look like this.

Activate your frame layer
Star2: c&p, Duplicate, Resize 1st layer to 40% and 2nd layer to 20%, position 1st layer to liking to the left of the frame (I duplicated the 2nd layer 2X and used them at the bottom with the optional “Follow Me To…” text
Ribbon7: c&p, position to your liking to the right
Optional text on the bottom: I used the 2 Peas Typo font
Name: Angryblue Controlled font, rotate 11o left, (if you are saving as a WWO, duplicate this name, hide and save the vector and convert the duplicate to a raster) Select>All, Select>Float, Select>Defloat, Expand by 3, select layer below the name layer and open New Raster Layer, Flood Fill with color of your choice. I used a light color and added a Drop Shadow to the name and the name outline/background.
Disco ball: c&p, resize 70% position behind the “Get Funked!” word art, arrange the layer below your exclamation mark background shadow (if you add a Drop Shadow to your disco ball, make sure you add it on a separate layer).
Add the copyright and your license #. I suggest that you place it in a way that it can not be removed or altered without being obvious, I added a Gradient Glow and merged mine down onto my CU layer
OK…we are getting ready to add the animation. If you want drop shadows on the 3 rectangle layers, activate your white background layer, Select>All, Image>Crop To Selection (if you don't do this, you will end up with shadows around your edges from the paper), Duplicate the each frame layer and Merge Down the 1st frame onto the rectangle/s and add your Drop Shadow/s on the same layer
Now, activate your small circle layer and select it by clicking on it with your Magic Wand
Activate your glitter layer and hit Delete on your keyboard
Repeat on rectangle1, rectangle1 frame and rectangle2; hide the small circle and Select>None
Drop Shadows on the non-animated elements (stars, bow, ribbon, beads, screws…) can be added on the same layer, as well

Merge together your frame (from the kit) and Drop Shadow, if you used one; all the stars, glitter, screws, bow, ribbon, beads, optional text at the bottom, and the Drop Shadow to the disco ball, if you used one. Duplicate this merged layer 29X…no, this is NOT a typo…LOL
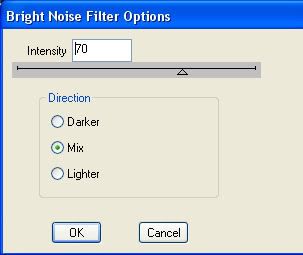
Duplicate each of your frame layers 9X and apply Bright Noise with these settings

clicking on Mix 2X for the 2nd thru the 9th layers of each group.
Duplicate your disco ball 9X and, starting with your 1st layer, apply Constellation with these settings

Clicking on random seed for the 2nd thru the 9th layers
I have both words and the exclamation mark locked with it’s corresponding background and shadow. You can arrange them in any manner in which you please. If you don’t like the colors, you can change them easily with your Manual Color Correction Tool.
Once you have them arranged to your satisfaction, merge together your words and exclamation mark only, Select>All, Select>Float, Select>Defloat, Merge Down onto your backgrounds and shadows, until all of your word art layers are merged into one layer. DO NOT SELECT NONE!
Duplicate layer 9X and, starting with your 1st layer, apply Bright Noise with these settings

Clicking on mix 2X for the 2nd thru the 9th layers, Select>None.
Activate your merged CU layer and with your Magic Wand at these settings

Select random areas of the jewelry…mine looked like this

Duplicate your CU layer 9X and, starting with your 1st layer, apply constellation with these settings

Clicking on random seed for the 2nd thru the 9th layers
To make this a little easier and less frames to have to work with, I arranged my disco ball, word art and CU layers, in their correct order like this (just an example…not all the layers are included in the screenshot)

and merged each group together, ending with this

Now, starting with your 1st small rectangles frames layer (working from the bottom up) duplicate each layer 2X (you want a total of 3 layers of each frame, giving you 30 layers in each group)
Repeat for the rectangle1frames, rectangle2 frames, and your merged layer with the CU, disco ball and word art. DO NOT ARRANGE THESE LAYERS! We are speeding up the animation for the CD and want these animations slower, that is why we are duplicating them;)
I do not include names, since I always save as a .psp for WWO’s and, for this image, it is easier just to merge your groups, save a .psp for WWO’s and a .psd that you can open in AS3, copy the name over to AS3 and duplicate it 29X and paste it into the image.
If you have decided to skip all the animation and go with a .png, crop, delete the white background and merge visible.
If you have decided to take on the animation, merge the small rectangles layer and the mask layer down onto the white background and duplicate this layer 29X
Duplicate rectangle1 and rectangle2 29X
You should now have 9 groups of 30 layers (not including the name layers, which should be hidden)…yes, 270 layers…it’s really not as intimidating as it sounds.
Activate your 1st background layer, right click, View>Current Only
Now, make only the 1st layer of each group visible, right click on your visible background layer, Merge>Merge Visible. Make this layer invisible and make the next layer in each group visible, right click on your visible background layer, Merge>Merge Visible make this layer invisible and continue to repeat these steps until you have all of your layers merged. View>All and then hide your name layers. Crop and save as a .psd or .psp (animation shop)…I always save as in both.
Animation Shop 3
Open your image in AS3, Select>All (Ctrl+A), Frame Properties (Alt+Enter) and change the value to 4, hit Enter on the keyboard.
Go back over to PSP, make your name layers visible and Merge them together, including Drop Shadows, if you have them, Edit>Copy (Ctrl+C).
Go back over to AS3 and Paste as New Animation (Ctrl+V), Duplicate (Ctrl+L) 29X, Select>All (Ctrl+A), Copy (Ctrl+C). Make sure that all of the frames in your image are still selected; if not, Select>All (Ctrl+A), Paste Into Selected Frame (Ctrl+E), position name to your liking and left click on your mouse. If you want to view your animation before optimizing it, just go to View>Animation;)
OOPS…forgot about resizing it…Animation>Resize Animation (Shift+S), resize to your liking
Optimize: File>Optimization Wizard (Shift+Z)
Walla!! We are finally done!!!
You have no idea how relieved I am to finally have this done and posted!! Believe me, I am absolutely positive that, if you encountered any problems doing this, it was definitely far less trouble than I had making it…I think that I ran into more issues and mistakes than I’ve had over the last couple of years, combined…LOL but I think that I may have learned a thing or 2 along the way:)
Just to let you all know too that, if you want your CD to spin slower, just duplicate everything one time, rearranging the CD's like the tut says but only doing it once, instead of twice. That will give you only 20 layers of each group to work with and then set your frame speed to 6 instead of 4 over in AS3....
Just to let you all know too that, if you want your CD to spin slower, just duplicate everything one time, rearranging the CD's like the tut says but only doing it once, instead of twice. That will give you only 20 layers of each group to work with and then set your frame speed to 6 instead of 4 over in AS3....
**Addendum**
The CD that I supplied is the correct size, you do not need to resize it.
There are a number of things you can do to decorate the CD...All I have done is made an example of what you can do with the it, based off of another tag that I made with a spinning CD. Everything else is pretty much the same, with just a few changes because the CD is a lighter color
tube: c&p, above the CD, I resized my tube by 130%, sharpened and positioned so that her eyes were visible at the edge.
Activate the CD layer, Select>All, Select>Float, Select>Defloat, Select>Invert
Activate the tube layer and hit Delete on the keyboard, Select>None
Grab your eraser and make it the same size as the clear circle in your CD and erase the remainder of the tube, inside the clear part.
Apply Xero/Radiance with default settings and then apply Xero/Porcelain with default settings, change the Blend Mode to Soft Light and Duplicate.
Merge Down the 1st CU layer onto the CD and then the 2nd one. Do not merge your 2 CU layers together first.
I added my Drop Shadow to my Funky Productions word art; you should not need to resize the word art or change the position with your pick tool, it should fit perfect. Changed the Blend Mode to Soft Light, Duplicate;
Merge Down the 1st word art layer onto the CD and then the 2nd one.
I kept my Funky Babe word art the same as the tut and merged that down onto my CD
This is what I ended up with...the rough edges will go away when you add the Drop Shadow, after your rotate, as the tut is written above.
If anyone has any suggestions on how to get rid of this and have a smooth edge all the way around, please feel free to email and tell me...PLEASE...lol
Maybe someone will take it on and use it and send me a copy of what they made with it and I can post that one:)
OK...Now I think I am really done with this tut...lol
©X's & O's Dzynz and Tutorials
This Tutorial was written in June, 2011 by me, MsGoddess2U, and the concept of the tutorial is copyrighted.
See my TOU for further details
See my TOU for further details
No comments:
Post a Comment